Mastering Lightroom Organization: Lessons from a "Photography Marie Kondo"
In most areas of life, I’m the organized one. I’m the person friends call when they need to declutter or find a system that actually works. It’s a blessing and a curse.
However, when it comes to photography, my “excitable brain” takes over. I used to rush to my computer the second I walked through the door, diving into edits without giving the images time to breathe. The result? I often settled for boring shots and missed the hidden potential in others.
I realized I was being an “excitable twerp” and neglecting the powerful Lightroom organizational features at my disposal. If you’ve been glossing over the basics, here are a few ways I’ve revamped my Lightroom workflow to improve my editing process, featuring some recent shots from a trip to Winchester, Hampshire.
1. Why Importing is the Foundation of Your Workflow
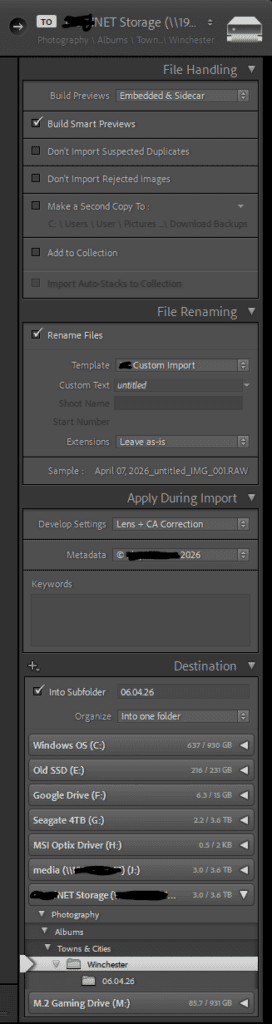
The secret to a clean library starts at the very beginning. Getting your import settings right saves hours of manual labor later. While everyone has their own “correct” way to do this, here is the setup that works for me:
Custom File Naming: I include the date, shoot name, and original filename. This makes searching your hard drive a breeze.
Automatic Develop Settings: I apply basic corrections to every photo upon import.
Metadata & Keywords: Tagging images immediately ensures you can actually find them three years from now.
Storage Strategy: I use a NAS (Network Attached Storage) drive to keep my folders structured and my PC’s internal drive clutter-free.
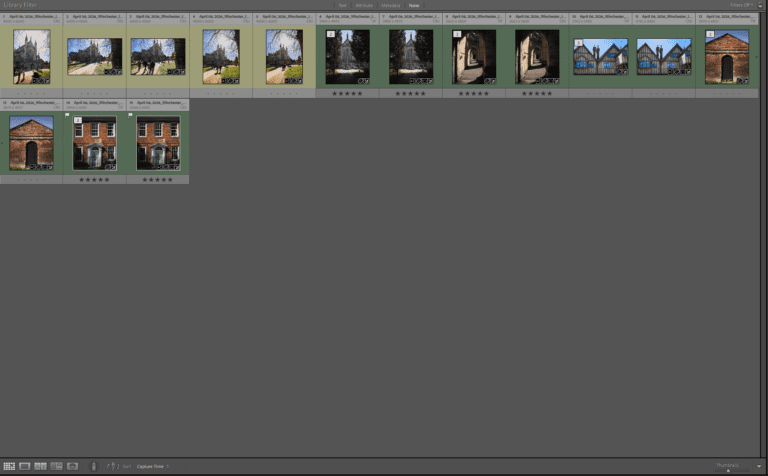
2. Rating vs. Hating: The Simple Traffic Light System
I used to find the rating and color-coding features in Lightroom a bit overwhelming. Now, I use a simplified “traffic light” system to track my progress:
The Flagging Phase: First, I quickly flag the “keepers” and reject the “duds.”
Yellow (Work in Progress): If I start an edit but get stuck, want to try a different direction, or just need a break, I tag it Yellow.
Green (Finished): Once I’m happy with the final look, it turns Green.
The 5-Star Export: All my “Green” images get a 5-star rating, making them easy to filter and export in one batch.
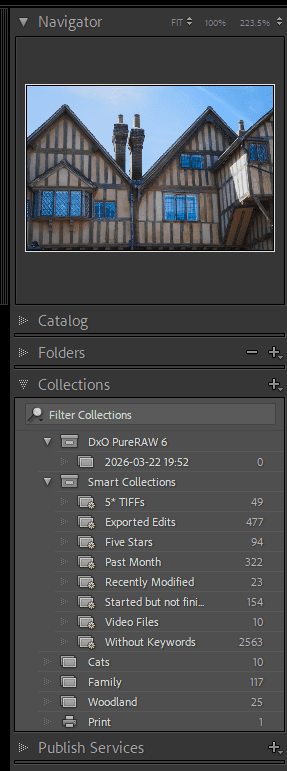
3. Using Smart Collections to “Collect ‘Em All”
My favorite “Marie Kondo” tip for Lightroom is using Smart Collections. When your library grows into the thousands, you need a way to find specific images fast without scrolling forever.
Smart Collections allow you to automatically group photos based on specific criteria. I have collections set up for:
5-Star TIFFs: For those deep-dive edits from Photoshop.
Frequent Tags: I have automated folders for “Cats,” “Family,” and “Woodland.”
In-Progress Edits: Anything tagged yellow that needs a second look.
How to set it up: Click the [+] button in the Collections tab, select “Create Smart Collection,” and set your rules. It is incredibly flexible and does the filing for you.
Slow Down for Better Edits
The biggest benefit of getting organized isn’t just a tidy folder—it’s the mental space it gives you. By following a structured post-processing workflow, I’m forced to take a breath before I start moving sliders.
I hope these tips help you tame your own digital library! If you have a different way of organizing your catalog, I’d love to hear it (even if I did threaten to turn the comments off!).
Happy snapping!